- Tinted Paints
- Interior Emulsion Paint
- Interior Trim Paint
- Interior Varnishes & Oils
- Interior Furniture Paint
- Anti Mould Paint
- Anti Damp Treatment
- All Surface Primer
- Special Surface Primer
- Floor Paints & Coatings
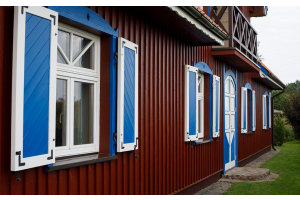
- Exterior Paint
- Exterior Masonry Paints
- Exterior Trim Paints
- Exterior Paint Undercoat
- Exterior Oils & Varnishes
- Shed & Fence Paints
Taking the Pain out of Paint – a Guide to Painting your Home
April 28, 2015
Posted:
April 28, 2015
Categories:
Painting & Decorating
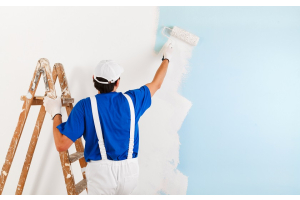
If we say "paint" to you, one of two images is going to leap into your mind. The first, is a lovely idyllic scene of a hobby painter. She's got an easel, perhaps there's a sunset, and she's painting a lovely scene of rural beauty.
The other isn't a scene that'll make it into any gallery. It's you. Perched atop a stepladder, with a paintbrush in hand, frozen in that split-second after you've failed to juggle two tins of paint without climbing back down. One of those tins – probably the multi-surface paint - is hurtling towards the floor, and you're not totally convinced that the bedsheets protecting your carpet are up to the task.
Yes, mention paint to any reluctant home decorator, and you'll trigger at least one painful memory.
We're here to stop that. We're going to make painting your home a breeze. We're going to take the pain out of paint.
Step One: Know Your Paints!
If you slap a coat of damp proofing paint on your living room wall, you're going to have a bad time. Knowing which paint to choose for which purpose is the key to minimising your decorating woes. So here's a quick guide:
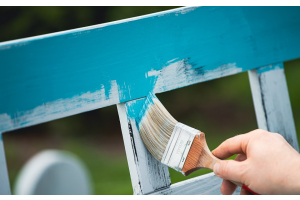
- Multi Surface Paint: Does what it says on the tin. Multi surface paint is used to finish any surface, from plastered walls to brick and wood.
- Paint Undercoat: Don't use this for your dado rails. This undercoat is designed to help colour paints and finishing paints adhere to your walls.
- Damp Proofing Paint: For external use, and use in problem damp areas, damp proofing paint is perfect for keeping dry areas dry.
- Stain Block: This lifesaving coating is perfect for kitchens, bathrooms or renovations, as it covers water, soot and other stains prior to decorating.
- Wood Treatments: Not every coating is a paint – when it comes to fences and furniture, a wood treatment gives a far nicer, natural finish.
- Paint Masking Fragrance: Finally, this little lifesaver will make your newly decorated rooms liveable by masking that dizzying fresh paint smell.
Step Two: Protection is Better than Cure!
Now you've chosen the right paint for the job, and you're not about to slap a layer of wood treatment on the plasterboard, you need to make sure you're protecting your carpets and soft furnishings.
If you're expecting a future blog post about easily and painlessly removing paint stains from a leather sofa, you're going to be disappointed, because paint is designed to stay where it dries. So take precautions!
If it can be moved – move it. Get your furniture away from any walls you're about to paint. Into another room, if possible.
Secondly, cover everything else in something thick and sturdy. We've got a range of sheets and protectors that'll help, along with the obligatory masking tape.
Then, and only then, move on to the painting.
Step Three: Slow and Steady Wins the Race!
Everything is set, so get started. But take things slowly. Don't just slap the paint on there – be methodical and careful, and don't be afraid of going back for another coat. Remember, it's far easier to add more paint than it is to take paint away, so always err on the side of caution.
Leave plenty of time for everything to dry, splash on some of our paint masking fragrance, and voila!
Time to enjoy your painlessly painted home.

Recent Posts
April 05, 2024
March 22, 2024